Setting Genie Chain Drive Limits
Setting Genie Chain Drive Limits
SETTING THE “DOWN” LIMIT (To purchase these limits click onto Genie Limits 24701R)
STEP 1:
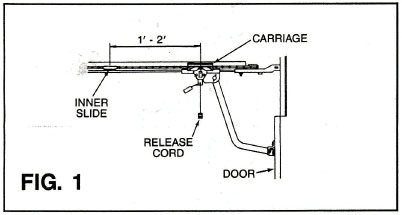
Remove any old limit clips which may still be attached to the chain. Using the push button or transmitter, position the garage door approximately 1 to 2 feet from the closed position.
STEP 2:
Disengage the carriage from the inner slide by pulling on the red release cord. Manually close the garage door. Measure the distance between the middle of the inner slide and the middle of the carriage.
STEP 3:
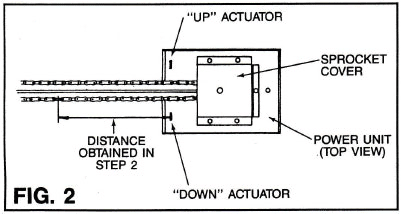
Remove three limit clips and three self-tapping screws from the parts bag. The garage door remains closed. Viewing from the top of the power unit, note the two limit actuators, (“up”and’down”). Using the same distance (1′-2′) obtained in STEP 2, measure along the chain from the “down” actuator.
STEP 4:
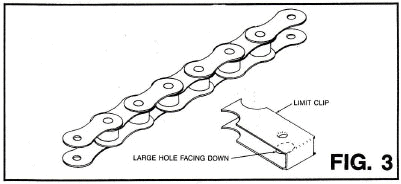
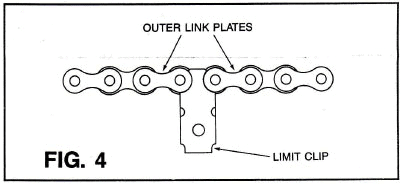
Attach a limit clip at the position determined in SIEP 3. With the large hole in the clip facing down, attach the clip over the top and bottom of the chain as shown in FlG. 3. The “hourglass” shape at the ends of the clip should be positioned between two outer link plates of the chain as shown in FlG. 4.
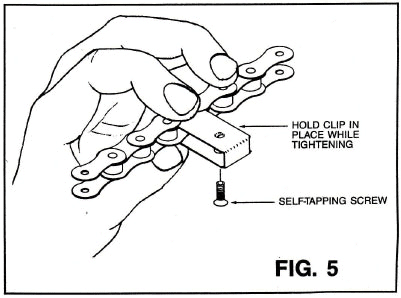
STEP 5:
Secure the clip to the chain by installing a self-tapping screw into the clip. Tighten the screw securely while holding the ends of the clip firmly in place on the chain as shown in FIG’.5.
SETTING THE “UP” LIMIT
STEP 6:
Be certain the carriage release lever remains disengaged. Manually open the garage door. Measure the distance between the “up” actuator and the middle of the carriage. (Note: The inner slide will remain stationary during this step.)
STEP 7:
Manually close the garage door. Measuring from the center of the inner slide toward the power unit, attach a limit clip to the chain at the distance obtained in STEP 6. Secure the clip to the chain with a self-tapping screw.
STEP 8:
Install the third limit clip 6 rollers away from the “up” limit clip. The third, or “security” limit clip should be located between the “up” limit clip and the inner slide. Be sure to securely tighten the self-tapping screw.
STEP 9:
Re-engage to the inner the carriage slide. Check the limits of your installation by operating the door opener. If any limit adjustment is necessary, the limit clips can be removed and repositioned on the chain by completely removing the self-tapping screws.
Once the limits are set, be sure to re-install and securely tighten the self-tapping screws.
To download a printable pdf file of the above directions click onto the link below: